How to use Screen Time to keep your iPhone use within healthy limits

We all spend a lot of time on our phones, and it’s possible — just possible — that some of us spend too much time. In 2018, we ran an article explaining how to use what was then Apple’s brand-new Screen Time feature, which was built in order to help people keep their on-screen time in some sort of sane proportion.
At the time (which was when iOS 12 came out), you could use Screen Time to check how much time you spent on your phone, use an App Limits feature to limit your (or your kids’) daily time spent on various apps or types of apps, or use its Downtime feature to cut off access to all (except a few) apps.
Since then, and especially since iOS 13 came out, Screen Time has been expanded, making it easier to lock down apps and / or limit your screentime. (There have been no additional features announced so far for the upcoming iOS 15, but we’ll add them here if there are.)
To begin using Screen Time, go to “Settings” > “Screen Time.” Here are some of the things you can do.
Daily Average
At the top of the Screen Time app, you can see an accounting of your activity over the course of the day. Click on “See All Activity” to see a breakdown of which specific apps you used and how long you used them.


Downtime
Downtime lets you set periods when you want to force yourself to give your eyes a rest and avoid staring at the screen. It does this by locking down the apps with which you are most likely to spend time. These lockdowns are not absolute — as you’ll see later, you can cancel Downtime when you need to.
Begin by choosing when you want to start your time away from your phone.
- Tap on “Downtime” and toggle it on.
- Select the days (it can be every day or just on specific days) and times that you want to avoid getting swallowed by your favorite iPhone apps. During those times, only specified apps that you pre-selected (along with phone calls) will be allowed through. For example, you can disable Facebook and Twitter during working hours, but keep the Messages app going for texts. (We’ll go over how to choose which apps to disable in a moment.)
- You’ll get a warning before Downtime kicks in. If you need to keep working on an app, don’t worry — you’ll be given the chance to ask for one more minute, to be reminded in another 15 minutes, or to ignore the limit for today.


Keep in mind that Downtime, and the other Screen Time features, can be applied to all your devices that use iCloud. So if you set it on your iPhone, for example, it can apply to your Mac or iPad as well. To share your settings across your devices, go to the Screen Time main screen and toggle “Share Across Devices” on.
Now that you’ve chosen when you want some downtime, you’ll probably want to select which apps should be allowed to remain active.
Back in the Screen Time main screen, select “Always Allowed.” Here you can choose which apps you will still have access to during downtime.
- You’ll see two sets of apps: Allowed Apps and Choose Apps.
- To select an app you’ll always want access to, even during downtime, tap on the app’s name in Choose Apps and it will appear in the Allowed Apps list.
- If you want to disallow any of the Allowed Apps, tap on the minus sign next to the app, and then on “Remove.”
There are more ways to personalize Downtime. Let’s say you want to get alerted about text messages from specific people — you’re planning to concentrate on a project and don’t want to hear from any of your friends, but you still want to get texts from family members. You can do that.
- On the same “Always Allowed” page, tap on “Contacts” at the top of the page.
- Under “Allowed Communication,” select “Specific Contacts” and choose which contacts you want to allow through, even during downtime.
Note that the “Allowed Communication” page is also accessible from the main Screen Time page.
App Limits
Another way to keep your app use in check is to limit the amount of time you use an app (rather than setting what time of day you can use it). For example, if Twitter tends to be your personal black hole, you can decide not to spend more than, say, two hours on Twitter each day.
To set your app limits:
- In the Screen Time screen, select “App Limits” > “Add Limit.” Toggle “App Limits” on and tap on “Add Limit.”
- You’ll see a list of categories, such as “Social,” “Games,” and “Entertainment.” Tap on a specific category, and it will open up to show a list of all your apps that are in that category.
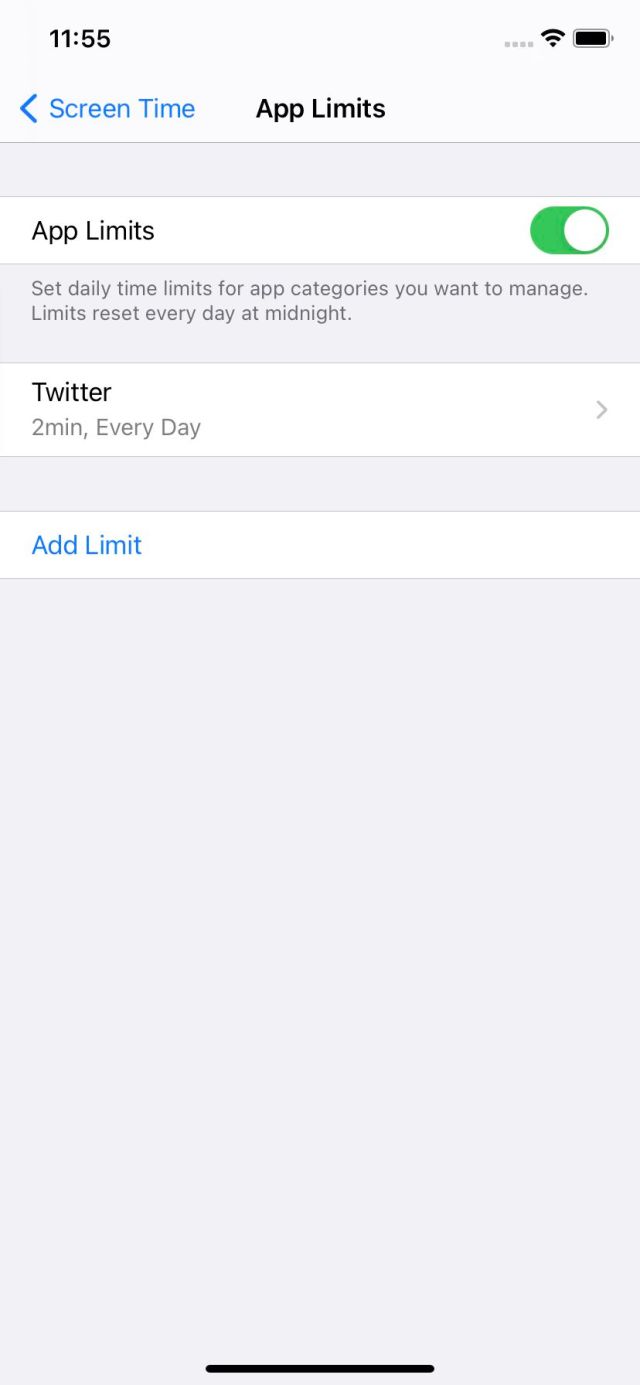

- Select the apps that you want to limit — or select an entire category to choose all the apps in that category.
- Tap on “Next” in the upper right corner.
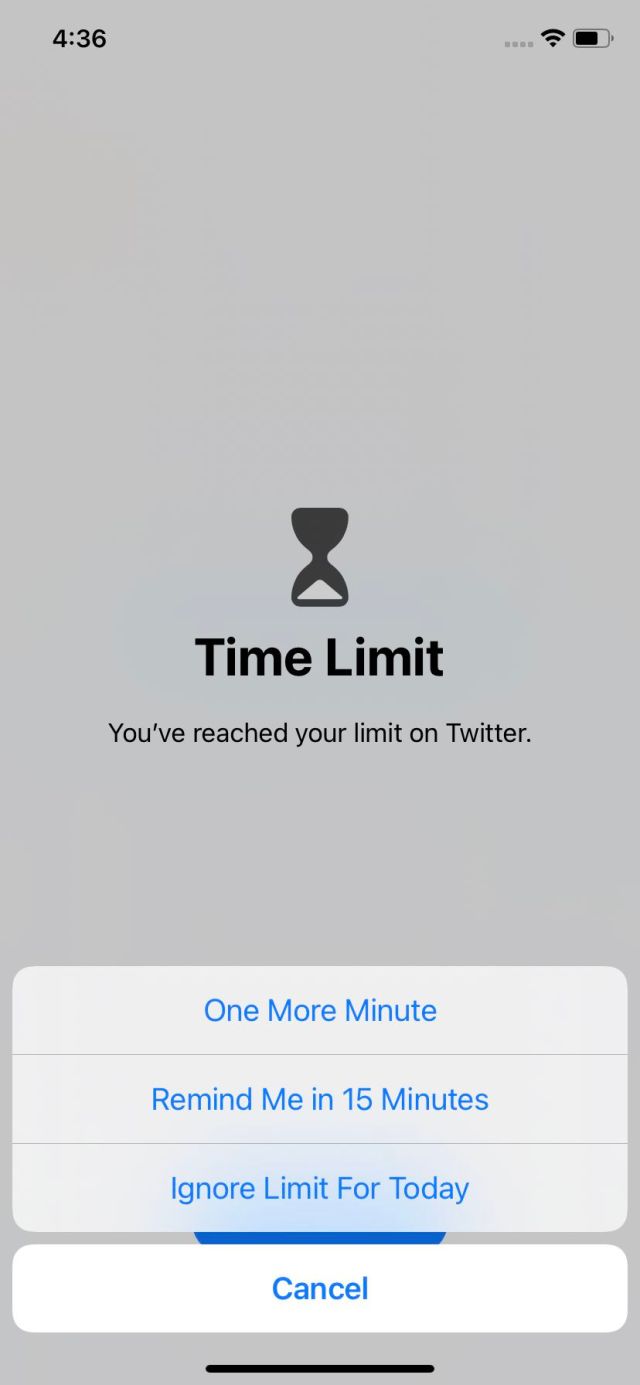
- Select the maximum amount of time you can use the app(s) on a daily basis. When you reach your limit, you’ll be interrupted by a screen that lets you either apply the limit (just tap on the “OK” button), or shrug and select “Ignore Limit.”
- If you choose the latter, you can get one more minute, ask to be reminded in 15 minutes, or decide to ignore the limit for today.

Note: if for any reason you don’t want to use an app at all, except for on rare occasions, you can set the Screen Time to 23 hours and 59 minutes. The app will then be out of reach unless you go back into “Settings” > “Screen Time” > “App Limits” and disable the limit.
Screen Time Passcode
If you want to keep certain apps out of the reach of your kids — or your roommate — then you can create a passcode that will be needed to make any changes to Screen Time. The passcode is also useful if you feel you need an extra barrier before you undo one of your limitations.
- Go to Screen Time and tap on “Use Screen Time Passcode.”
- Set a four-digit passcode, and then reenter it when asked.
- Enter your Apple ID and password so that you can use it if you’ve forgotten your passcode.
And that’s it. If you want to change or delete your passcode, go back to Screen Time and select “Change Screen Time Passcode.”
Content & Privacy Restrictions
The last selection in Screen Time isn’t as much concerned with when you use your iPhone as with what you see or hear on it. Select “Content & Privacy Restrictions” if you want to allow or restrict explicit content, keep TV shows or movies to certain ratings, set an age limit for apps, limit which websites are allowed, and set a number of different limits on games (such as multiplayer games, connecting with friends, or private messaging).
Most of this is geared toward parents who want to oversee what their kids see and hear online, but if you’d rather avoid accidentally crashing into any “adult” websites, it could be useful. There are also a number of privacy features, such as stopping Apple advertising, or not allowing apps to change the settings of your microphone, Bluetooth sharing, and other features.


We all spend a lot of time on our phones, and it’s possible — just possible — that some of us spend too much time. In 2018, we ran an article explaining how to use what was then Apple’s brand-new Screen Time feature, which was built in order to help…
