5 Nintendo Switch 2 settings I recommend changing as soon as you boot your new console up

There’s nothing quite like the excitement of a new console; feverishly whipping off the packaging, setting up your user account, and loading up your games to settle in for an hours-long induction to your new system.
Thrilling though the process may be, there’s a fundamental step all too often skipped: adjusting your settings. From Display and Audio settings to User, Lock, and software settings, there’s plenty to tweak in your Switch 2.
I’ve spent a week with the console, and there are some must-change settings you should adjust before getting started; here are my recommendations.
1. HDR settings
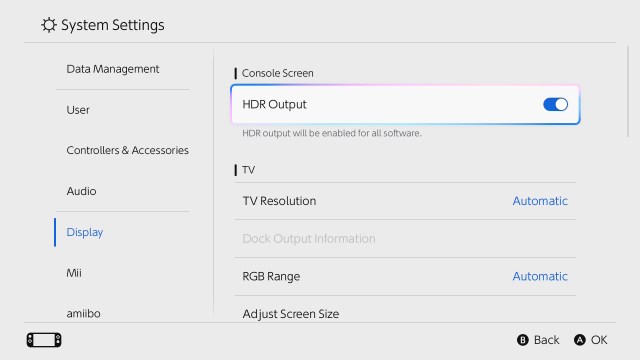
Nintendo’s latest console supports HDR, and you can easily toggle this on and off within the settings. Simply head to Settings > Display > HDR Output and make sure this setting is on by default.
Don’t stop there, though, because there’s a second setting which allows you to choose which games it’s enabled for. Scroll down in the Display menu, and you’ll see (confusingly) another HDR Output option. Select this, and you can choose between ‘Always Enabled’, ‘Compatible Software Only’, and ‘Disabled’.
I’d recommend switching it on for compatible games instead of the default always-on setting to make sure non-compatible games look as good as ever.
2. Preserve the battery life

If you’ve suffered from battery degradation on your first-generation Nintendo Switch, you’ll be delighted to know that the Switch 2 offers a setting that caps your battery life at around 90 percent while it’s on charge, which should help your battery long-term. Simply head to Settings > System > Stop Charging Around 90%.
You can easily toggle this on and off any time, so if you want a full charge every now and then for a long day of gaming in handheld mode, it’s just a matter of a quick trip to the settings. Alternatively, you can simply outsource the load and try a portable battery for your Nintendo Switch 2.
3. TV resolution
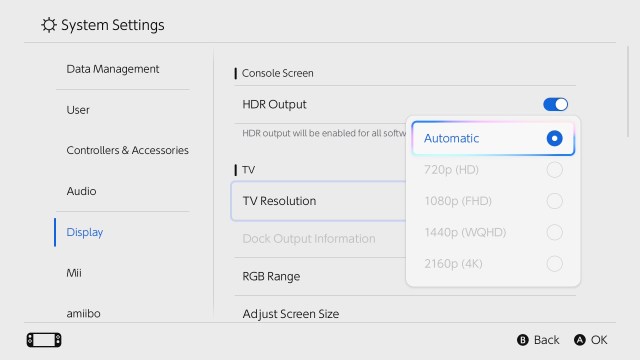
Gamers, rejoice – the Nintendo Switch 2 can support screen resolutions up to 4K, albeit at a 60Hz refresh rate and 60fps for most titles, but you might have different ideas for your new console. Again, head to Settings > Display > TV Resolution.
Within the settings, you can toggle automatic resolution detection or manually set the resolution for your TV, especially handy if you would prefer the higher refresh rates available in 1440p or 1080p resolutions.
4. Change your lock settings
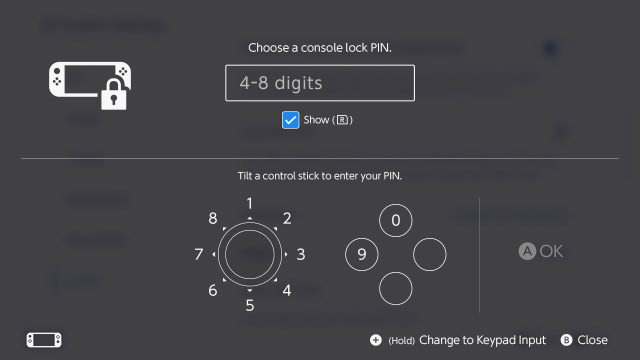
Depending on who else will be using your Switch, you may want to change your Lock Screen settings with the system lock menu.
Head to Settings > User, where you can select to Skip Selection Screen if you’re the only one using the console regularly. Alertanitlvey, head to Settings > System > Console Lock. Here, you can set a PIN to keep prying eyes and grubby hands off your new console, but you can also opt to add parental controls using the dedicated Nintendo Switch Parental Controls app.
5. Activate Dark Mode
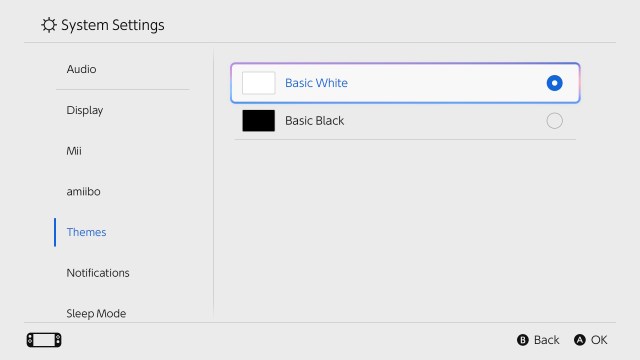
Sure, this one is a preference-based tip, but personally, I don’t see why you’d prefer to use the standard white theme over dark. Especially if you play mostly in handheld, it’s a great way to conserve power and give your eyes some rest.
Once again, navigate to Settings > Themes and select between Basic White and Basic Black.
You Might Also Like…

There’s nothing quite like the excitement of a new console; feverishly whipping off the packaging, setting up your user account, and loading up your games to settle in for an hours-long induction to your new system. Thrilling though the process may be, there’s a fundamental step all too often skipped:…
